TK Selection Brush updated

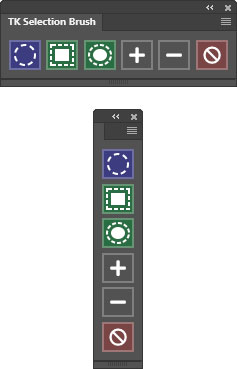
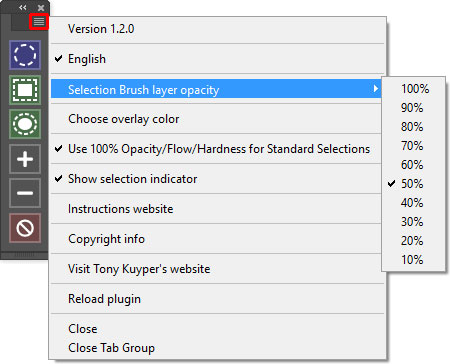
Just a quick article to let readers know that the TK Selection Brush plugin has been updated to version 1.3.1. To check your version, open the preferences (fly-out menu in upper right corner).

Listed below are two ways to get this free update. You only need to use one. They both provide the same results.

  • Preferred option: Use your original TK Selection Brush download link. Search your email for “client@e-junkie.com” (the download server email address). That link now downloads version 1.3.1.
  • If the original download link doesn’t work or you can’t find it, visit the Selection Brush download page and obtain a new free download link.

Installing a fresh download will overwrite the previously installed version with version 1.3.1.

What’s new?

  1. The plugin now remembers the layer that was active immediately before using the Selection Brush, and, when the selection is output, that layer is again made the active layer. This feature can be useful for touching up layer masks later in the workflow or for painting on layers buried in the layer stack.
  2. For STANDARD selections, if “Use 100 Opacity/Flow/Hardness for Standard Selections” is DISABLED in the preferences (the default is Enabled), the plugin remembers the previous Opacity, Flow, and Hardness settings that were used for the Selection Brush. This means that if you have discovered some useful settings for Opacity, Flow, and Hardness for the Selection Brush for your workflow, the plugin will remember these the next time you make a standard selection using the plugin provided that “Use 100 Opacity/Flow/Hardness for Standard Selections” is DISABLED. NOTE: For rectangle and lasso object selections with the Selection Brush, Opacity, Flow, and Hardness are still automatically be set to 100% because that’s what is needed for these options to work properly.
  3. A bug has been fixed. The lasso object selection did not work properly if the units for the Photoshop Ruler were set to something other than “Pixels.” This has been corrected so that lasso object selection now works regardless of the units chosen for the Photoshop Ruler.

In case you missed it . . .

Sean Bagshaw and Dave Kelly have both recorded excellent videos that show you how to get the most out of the TK Selection Brush plugin. These are linked below.

New and Free: The TK Selection Brush plugin

The TK Selection Brush plugin is FREE and can be downloaded here.

The new TK Selection Brush plugin takes the basic idea of a selection brush, first used in the TK Gen Fill plugin, and expands what it can do. With it, the Photoshop Paintbrush tool is the primary tool used to make selections. For standard selections, the brush’s Opacity determines the degree of selection for partial selections and Hardness (specifically a low value for Hardness) is used to create feathering. This newest iteration, though, goes beyond making standard selections. It is also able to SELECT OBJECTS, again, using the Paintbrush tool. Overall, the Selection Brush is a new way to think about making selections, and the plugin allows users to experiment with this concept.

The diagram below describes what the different buttons do.

Using the plugin is easy.

  1. Choose a type of selection by clicking the corresponding button: Standard Selection, Rectangle Object Selection, or Lasso Object Selection. The button for the chosen type of selection highlights and is given a colored outline. The ADD button also receives a colored highlight.
  2. Paint on the image to define the selected area.
  3. Click the same button that was used to choose the type of selection to output the painted areas as a selection. (The correct button will be highlighted and outlined to remind you which one to click.)

Additional tips and best practices for using this plugin are found on the download page.

Depending on your workspace, the Selection Brush plugin can be oriented horizontally or vertically. To change the orientation, hover the mouse over an edge to get the double-arrow cursor. Then press down on the mouse to drag the edge to change the plugin’s width or height.

In its horizontal orientation, the width of the Selection Brush plugin matches that of other “TK” plugins, like TK9. This allows it to be conveniently docked with the other modules. I’ve started keeping it open in my workspace in order to experiment with using more object selections in my workflow.

Additional options for this plugin can be found in its fly-out menu in the upper right corner.

Personal Experience

The original development of this plugin was aimed at only making standard selections. The object selection capabilities came later, but have since become what I use this plugin for most. The Selection Brush accesses Photoshop’s rectangle and lasso Object Selection tools when the painted areas are output as object selections. However, it’s usually more convenient to use the Selection Brush to define objects to be selected instead of using the Object Selection tool’s rectangle or lasso options. The sections below discuss how to do this.


To use the Selection Brush’s RECTANGLE Object Selection function, first click the Rectangle Object Selection button.

Then, put a few dabs of paint around the perimeter of the object to be selected, the white rock in this case. These dabs of paint will eventually define a rectangle used to select the object, so put them at the outer edges on the top, the bottom, and the two sides.

Finally, click the plugin’s highlighted Rectangle Object Selection button again to select the object.


To use the Selection Brush’s LASSO Object Selection function, first click the Lasso Object Selection button.

Then, adjust the brush size to paint over the edge of the object to be selected. It’s helpful to have the brush strokes extend a little beyond the outer perimeter of the object. For straight sections, the “click-SHIFT-click” method can be use to paint straight lines. It’s also fine to cover the object to be selected entirely with paint, which is usually more convenient for small or narrow objects. If the object touches the edges of the frame, be sure to include that edge in the painted area.

Finally, click the plugin’s highlighted Lasso Object Selection button again to output the painted area as a selection.

For irregularly shaped objects or in images cluttered with many different objects (like the image above), the Lasso method works better than the Rectangle method as it allows greater precision in defining the object to be selected.


NOTE: While this plugin is free, it does require Photoshop version 23.3.0 to install and has only been tested on the latest versions of Photoshop (starting in version 25.7.0) and Photoshop Beta.

I hope you’ll give this new plugin a try. Please feel free to contact me or to leave a comment if you have any thoughts or suggestions on how to make this tool better.